What causes jetting? Fixing it in order: gate, speed and temperature
The snake-like mark left on the part surface when melt squirts from the gate into an empty cavity: jetting. How it differs from flow lines, the role of gate location and type, fixing it with a speed profile, and permanent fixes in the mold.
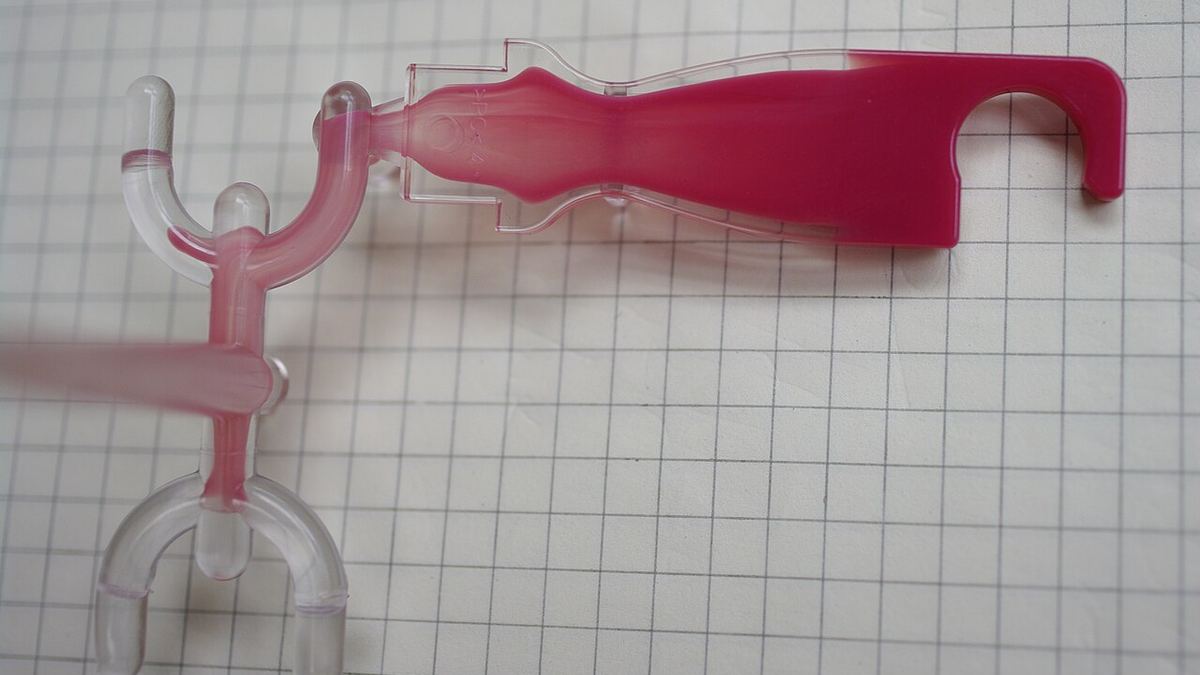
Jetting shows up on the part surface as a snake- or worm-like mark that starts at the gate and winds forward. The cause is simple: as the melt leaves the gate it finds no wall in front of it, so it squirts into the empty cavity like a thin rope, and that rope cools and solidifies first. The melt that follows wraps around it but cannot fully fuse with it; the trace of the first rope stays on the surface.
How it differs from flow lines
Flow lines usually appear as rings or waves around the gate and come from the flow front slipping and sticking on the mold surface. Jetting is a single winding rope mark running forward from the gate. The easiest way to tell them apart is a short-shot series: stop filling at 10%, 20% and 30% and look at the part. If there is jetting, you will clearly see the melt leave the gate as a rope and stretch freely into the cavity.
What causes it?
- The gate faces an open volume: There is no wall, pin or core in front of the melt to hit.
- The gate is small for the wall thickness it feeds: Going from a thin gate into a thick section, the melt speeds up and squirts.
- High initial injection speed: The faster the melt passes the gate, the longer and more visible the rope.
- Cold melt or mold: The squirting rope solidifies sooner and fusion becomes weaker.
Order of fixes: process first, then the mold
1. Slow down at the gate (speed profile). Fill the first 5–15% slowly, and increase speed once the melt has attached to the wall opposite the gate or to its own flow front. Most jetting is clearly reduced by this step alone. For the remaining fill speed, a viscosity curve test gives a good starting point; watch the effect of slower speed on fill pressure and weld lines at the same time.
2. Check melt and mold temperature. If you are running at the low end of the material's recommended range, raising it by a few degrees improves fusion; on its own it is often not enough, but it works well together with the speed profile. For mold temperature, see how to choose mold temperature.
3. The permanent fix is in the gate. Process settings suppress jetting but narrow the process window. In a new mold or a revision:
- Point the gate so the melt hits a wall, pin or core.
- Use an overlap gate or a tab gate: the melt first slows down and spreads inside the tab, then enters the cavity as a front.
- Widen the flow with a fan gate.
- Size the gate cross-section for the wall thickness it feeds; avoid entering a thick area through a thin gate.
For the pros and cons of gate types, see gate types and gate location.
Checklist
- Confirm jetting with a short-shot series; make sure it is not a flow line or weld line.
- Set up a profile that slows down injection at the gate.
- Keep melt and mold temperature within the recommended range.
- If it persists, talk to the toolmaker about gate direction, type and size.
To narrow down the symptoms step by step, use the defect diagnosis wizard; for a short summary of the defect, see the jetting defect page.
Is something missing or wrong in this article? .